Do you remember how secure you felt when your parents would guide you through a path holding your finger. It would feel as if nothing in the world could go wrong at that time. Why not give the same feeling of safety to your lil pup while you take it along for some fun walks. This does not certainly mean holding your dog wherever you go! Leashes have been specially designed for this purpose. The market is coming up with newer accessories for dogs each day which can completely attract you towards them but how would it feel if you could make a leash for your dog yourself. Furthermore, the hefty prices of these leashes in the market could certainly burn out a hole in your pocket.
Purposes of Dog Leashes:
Leashes designed for dogs should serve the following purposes:
- They should be thick enough so that your dog’s canines cannot cut through it.
- They should not cause rashes to your own hand while you hold the leash.
- It should be lightweight and strong.
The best conclusion that can be drawn from the above factors is to use ‘climbing’ rope for the leash.
But before we get into making the leash, let’s first assort all the materials that we would require.
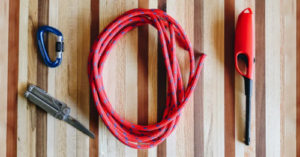
Materials Required for making a Dog Leash:
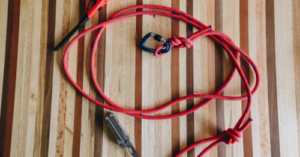
- A 10 ft climbing rope
- Pair of scissors
- A carabiner
- A lighter
So, let’s set our creativity into work.
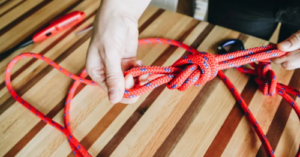
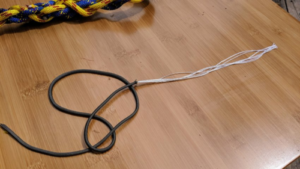
step 1 – Fold the climbing rope into two parts and make a strong knot. This is where we would put the carabiner and attach it with the dog collar. Use your thumbs to tighten the knot so that it cannot easily come off.
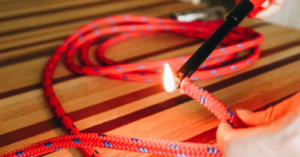
Step 2 – Now before we proceed further, it is advised that you burn a little of the ropes’ ends. This would prevent the rope from fraying and can increase its life. Also, before you make the knots at the ends, scrape the ropes a little so that the knot has more friction.
Step 3 – At the ends of the collar, make another knot for you to hold while you carry your dog along for the walk.

And the job was this easy.
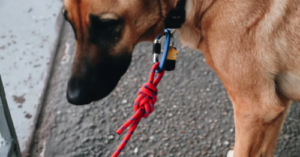
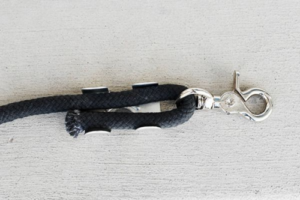
This is how your leash would look after the work is done.
This is the simplest design that you can make for the leash but what about a few more colorful designs and patterns.
Requirements for New Design:
For this new design, you would require a buckle and another rope (different color) along with all the other requirements.
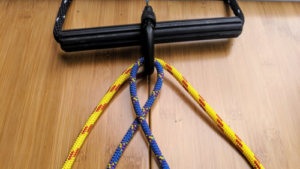
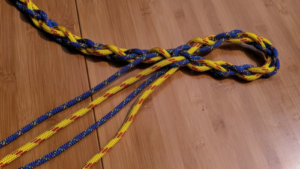
- Firstly, cross over the blue rope and then pass it from below the yellow rope.
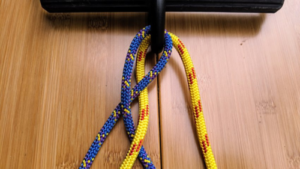
- Now, take the cord that is on the left and pass it through the rightmost yellow cords creating a DNA type of structure. Then take the cords on the right and immediately pass them through the cords on the left.
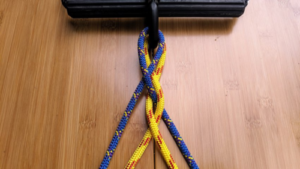
- Keep braiding till a considerable length and this how the design would look after a few steps.
- For the four cords that are still left, tie them around the braided rope in the form of a tight loop. Still to form a stronger bond, use metallic paracords and make a tight knot.
- In the end, add a carabiner in the end that can be attached with the loop. Burn all the left-over edges of the rope so that fraying does not take place.
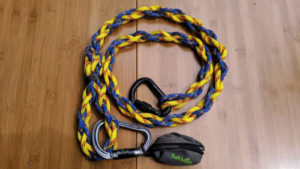
This is how your designer leash would look after it has been braided.
Now, different materials can be used for making the leash. These include using leather cords or using paracords.
Video demonstration of these are given below:
Also except for carabiners, snap hooks can also be used as they offer much more strength and offer much less pressure on the D-ring of the dog collar.
The only problem with leashes is that the sudden push that is offered by the owner sometimes can cause a lot of problems for the dog. from neck sprains to windpipe injuries, leashes with them always carries a life threat. Thus, when you design a leash, you need to properly inspect as to what size and breed of the dog you have.
For smaller dogs like the pugs, it is better that you make a leash with 2-strands. This is because they would not require a very strong rope or a force to walk along.
But for stronger and bigger breeds like the Saint Bernard or boxers, it is better that you braid at least 4 ropes together so that they can form a firmer hold. Also, these breeds have the tendency to cut the rope and run free.
Thus, firmer ropes should be used.
With this, we come to an end of how we can successfully make designer leashes for our dog. You might find many people who believe that dogs should be left free when they are out. But this stigma can have severe consequences if you are living in an urban area. So do not just believe on what other dog owners might feel because it is different for different people. You should know what is best for your dog and care for it like you would care for younger children.
Open the leash of your Dog only when it is in a surrounding that is safe enough for it to be let free. Consult your veterinarian about the material that is best for your dog and carry out any process after full measurements.
Afterall, it is about the love that your dog gives and how you reciprocate it.
Source:
https://www.thehonestkitchen.com/blog/diy-climbing-rope-dog-leash/